
STOP: See Cartridge Assembly Instructions First.
Roadware MatchCrete™ Clear comes with a square static mixer and does not use a flow-controller.

Safety Glasses

Safety Glasses

Shop Vacuum

Margin trowel and knife.

Razor Scrapper

Angle Grinder with diamond blake.

Medium grit colored sand or quartz to match the color of the surrounding concrete. Dry concrete pigments and color grouts my be used as well.

Roadware 300x300ml dual cartridge application tool. #5300
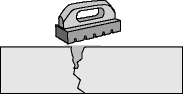
Clean out cracks with a diamond grinder or a wire brush.

Use a shop vacuum or compressed air to remove dust.

Apply a layer of MatchCrete™ Clear to the repair area.

Add specified sand and additional MatchCrete™ Clear in layers. Make sure to fully saturate the sand. for finer sands and pigments, it may be necessary to blend the material and the sand in a mixing cup before pouring the mixture into the repair are. Use just enough sand and /or color to generate the desired effect.

Strike off excess sand and MatchCrete™ Clear and allow to cure for about 40 – 90 minutes at 70°F (21°C).

Optional: After 24 hours, use a razor scrapper to cut the repair flush with the concrete surface.
 Optional: After 24 hours, use a finishing stone, sand paper, or similar device to blend the repair with the surrounding concrete.

Clean repair area. Remove all dirt, oils, and loose debris. Make a 1/4″ relief cut with grinder.
Remove any dust with a vacuum or compressed air.

Pre-wet entire spall with MatchCrete™ Clear.

Add specified sand and additional MatchCrete™ Clear in layers. Make sure to fully saturate the sand. for finer sands and pigments, it may be necessary to blend the material and the sand in a mixing cup before pouring the mixture into the repair are. Use just enough sand and /or color to generate the desired effect.

Use a margin trowel or taping knife to smooth and shape the sand and material mortar.

Finished repair is open for all traffic in about an hour. Any staining due to over banding will quickly wear off or can be removed with a light sanding after 24 hours.
Every reasonable effort is made to insure that every cartridge of Roadware MatchCrete™ Clear is easy to use and trouble free. Below is a list of possible problems, their causes and suggested solutions. For more information, please call Roadware Technical Service at 800-522-7623 or e-mail us at support@concretemender.com.
Problem |
Possible Cause |
Solution |
| Material does not cure. | Material was not mixed properly | Make sure all start-up procedures are followed. Check for any blockage of cartridge openings. |
| Material is slow to cure | Low ambient temperature | This material will set in approximately 10 minutes at 72° F. Cooler concrete and sand temperatures will increase cure time. |
| Cartridge is hard to pump or surges off ratio. | Rear plunger is sticking. Slight leakage (mostly found in partially used cartridges) has caused the “A” (light colored) material to crystallize on the plunger causing sticking and surging. | Carefully rim the skirt of the plunger seal with a small, flat screwdriver. |
| Material has cured inside the static mixer. | Replace static mixer. | |
| Cured material shows white spots when setting and curing. | Material is partially curing in the mixer before being ejected into the repair area. | Keep material flowing out of the gun as much as possible. When pausing the application, make sure a mixer-full of material is dispensed every 60 seconds. |
| MatchCrete™ Clear makes the concrete or repair link darker. | MatchCrete Clear™ is a clear polyurethane. Any clear material of a dry and pours surface will make that material appear, “wet” and will make the surface appear darker. | Plan your repair accordingly. For opaque repairs, use colored sand in the repair and buff the surface after 24 hours. |
| Material foams, bubbles, or grows when curing. | Moisture is in contact with the material. | Make sure sand is dry. When concrete is damp or green, dry with a heat gun or propane torch. Apply a layer straight 10 Minute Concrete Mender™ to the area. Allow to cure and continue the repair. |
Clean up
Wipe tools clean with a rag before material is allowed to cure. Cured material may be removed by abrading with a wire brush or soaking in acetone, xylene, MEK, or epoxy thinner. USE EXTREME CARE WHEN WORKING WITH INDUSTRIAL SOLVENTS.
MatchCrete™ Clear is very aggressive and will stain exposed skin. Gloves should be worn to keep material from contacting skin. In the event of skin contact, remove immediately with an industrial paint and stain hand cleaner.
SEE SDS SHEETS FOR FURTHER INFORMATION
Disposal Methods
Empty cartridges may be disposed of with normal waste disposal methods in accordance with Federal, State, and local environmental control regulations.
Unused material is best disposed of by mixing equal parts of side A and side B and allowed to cure in a waste container. Cured material may then be disposed of with normal methods.
ACTION TO TAKE FOR SPILLS/LEAKS: Properly protected personnel should contain spill. Ventilate area, cover spill with sawdust or other absorbent material. Scoop and place in open container and treat with decontamination solution (93% water, 5% ammonia, 2% detergent). Leave open in a ventilated area for 24 hours.
DISPOSAL METHOD: Bury or landfill decontaminated waste in accordance with Federal, State, and local environmental control regulations.
SEE SDS SHEETS FOR FURTHER INFORMATION
 Hold cartridge sideways over a waste container and remove retaining nut, mixer.
 Hold cartridge upright and place D-rings into the top ports. Place overcap on cartridge.
Store upright in a cool, dry place. Material will remain usable for a varying amount of time depending on the moisture level of the storage. Signs of moisture contamination are heavy caking and crystallization of the A-side material at the D-rings and the rear seals.
To reuse cartridge, follow normal start-up procedures.
Workers may be exposed to dangerous levels of silica dust when cutting, drilling, grinding, or otherwise disturbing materials that contain silica. These materials and tasks are common on construction jobs. Breathing that dust can lead to serious, often fatal illnesses. Click here to learn how to work safely with silica.